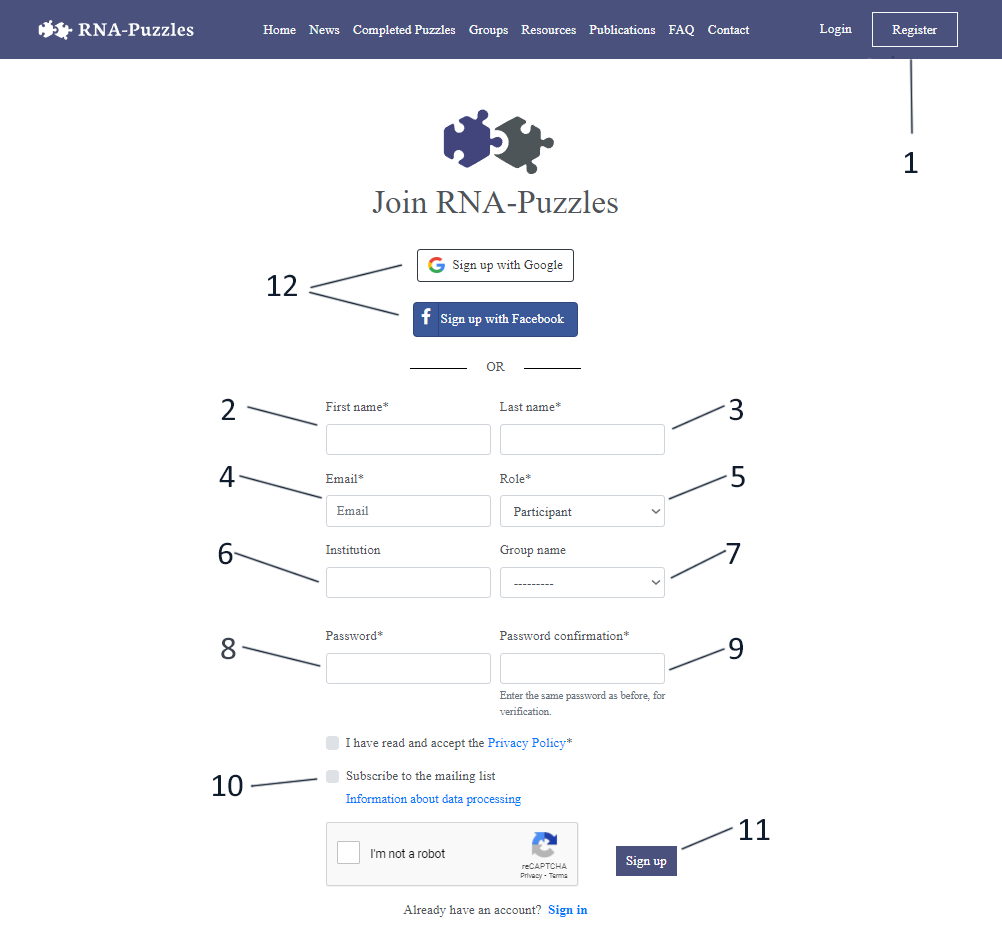
- To begin registration click Register button on the navbar located on the top of your screen
- Your Name
- Your Surname
- Your email address
- Role you wish to create your account for:
- Participant
- Group Leader
- Automatic - role will be assigned by an Administrator upon account confirmation
- Institution you belong to
- Choose proper group if you are a participant, no group at all if you are an organizer or you are gonna be prompted to type in a group name if you are a group leader
- Your password
- Your repeated password
- Check to subscribe to a mailing list and be informed about ongoing Puzzles
- Once you finish completing the form click Sign Up
- You can choose to register using your google account or facebook account
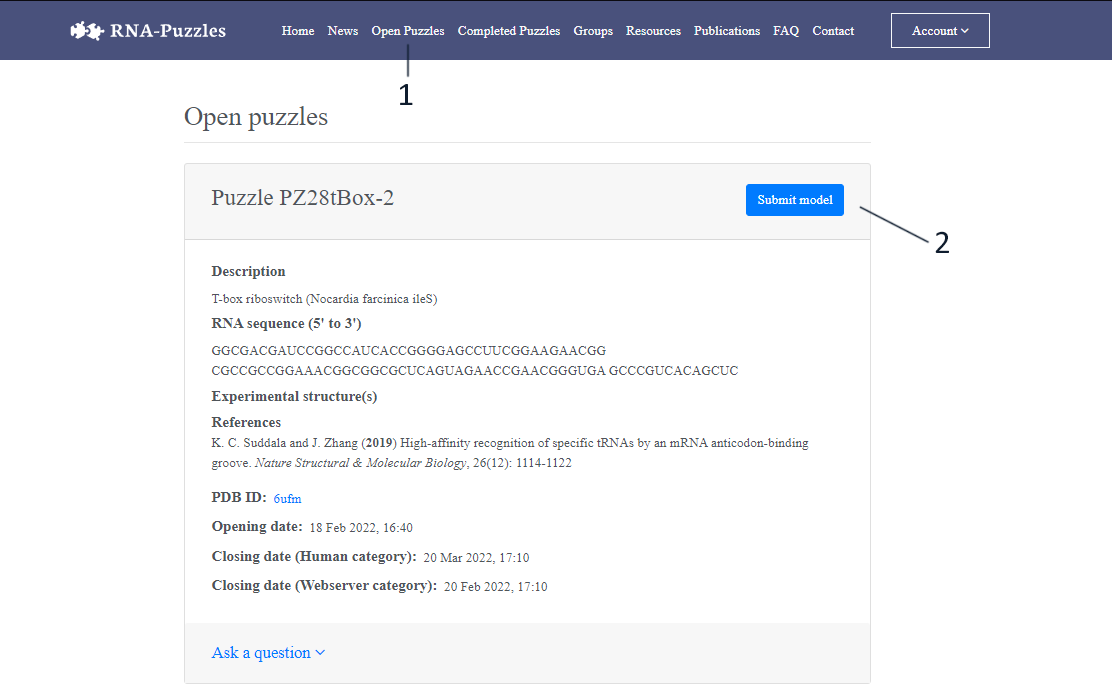
- Choose Open Puzzles button on the navbar located on the top of your screen
- Click Submit model button next to the challenge you wish to submit your solution for
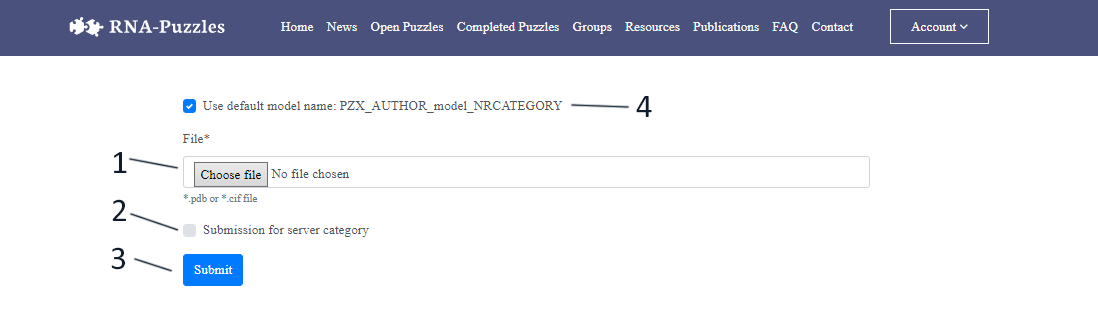
- Choose *.pdb or *.cif file containing model you wish to submit
- Choose whether you wish to submit your solution for server or human category
- Submit your model
- Check to use default model naming
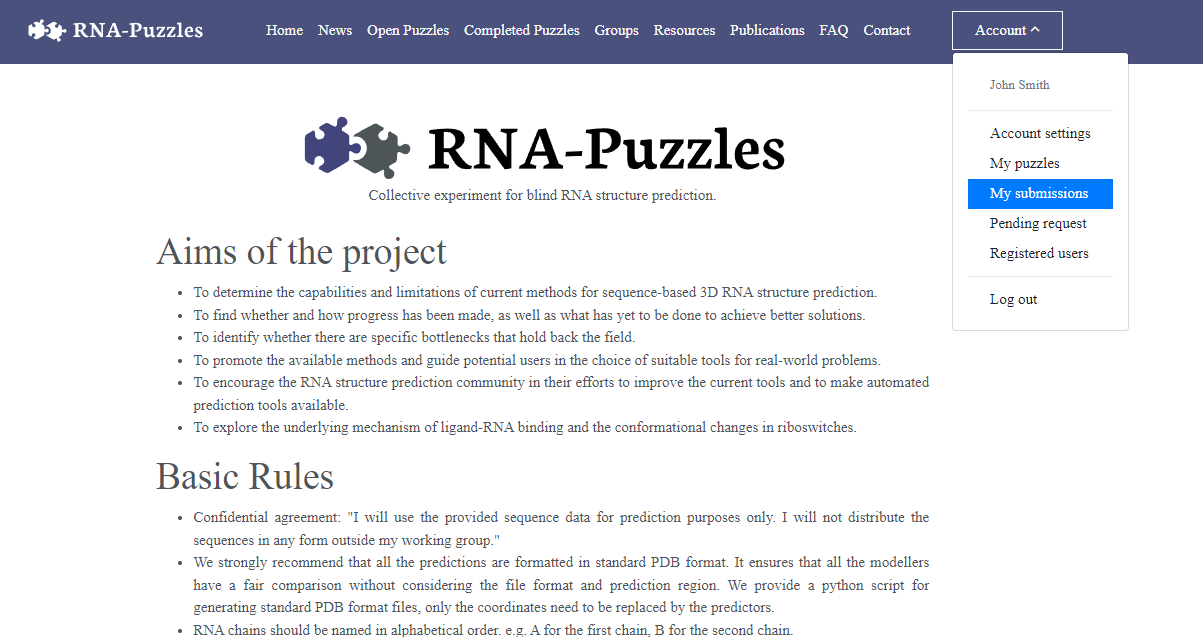
To see Your submissions firstly click dropdown button Account and then click My Submissions
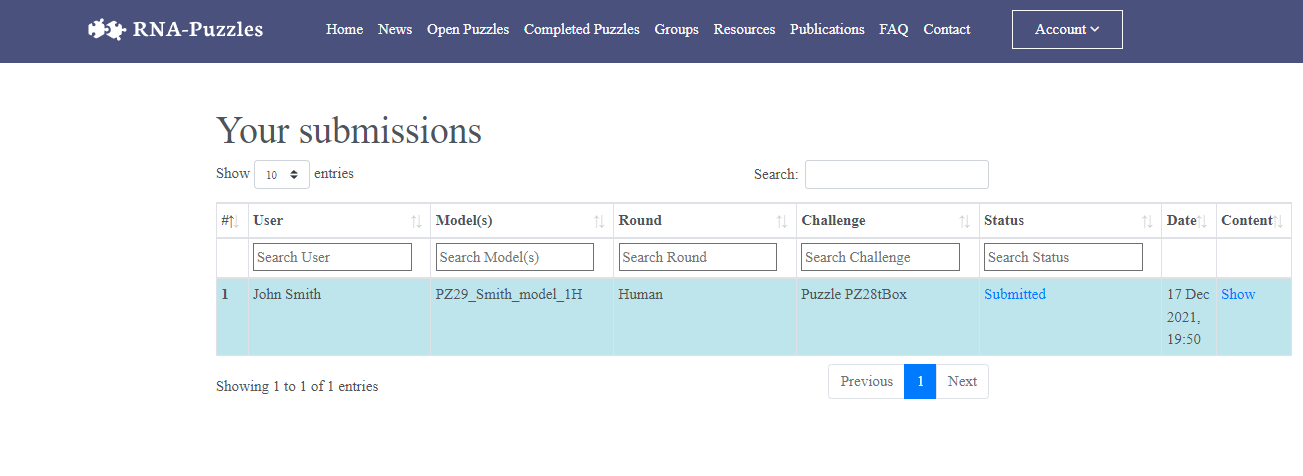
As you can see Your submissions will be displayed, and you have the ability to view its content and status.
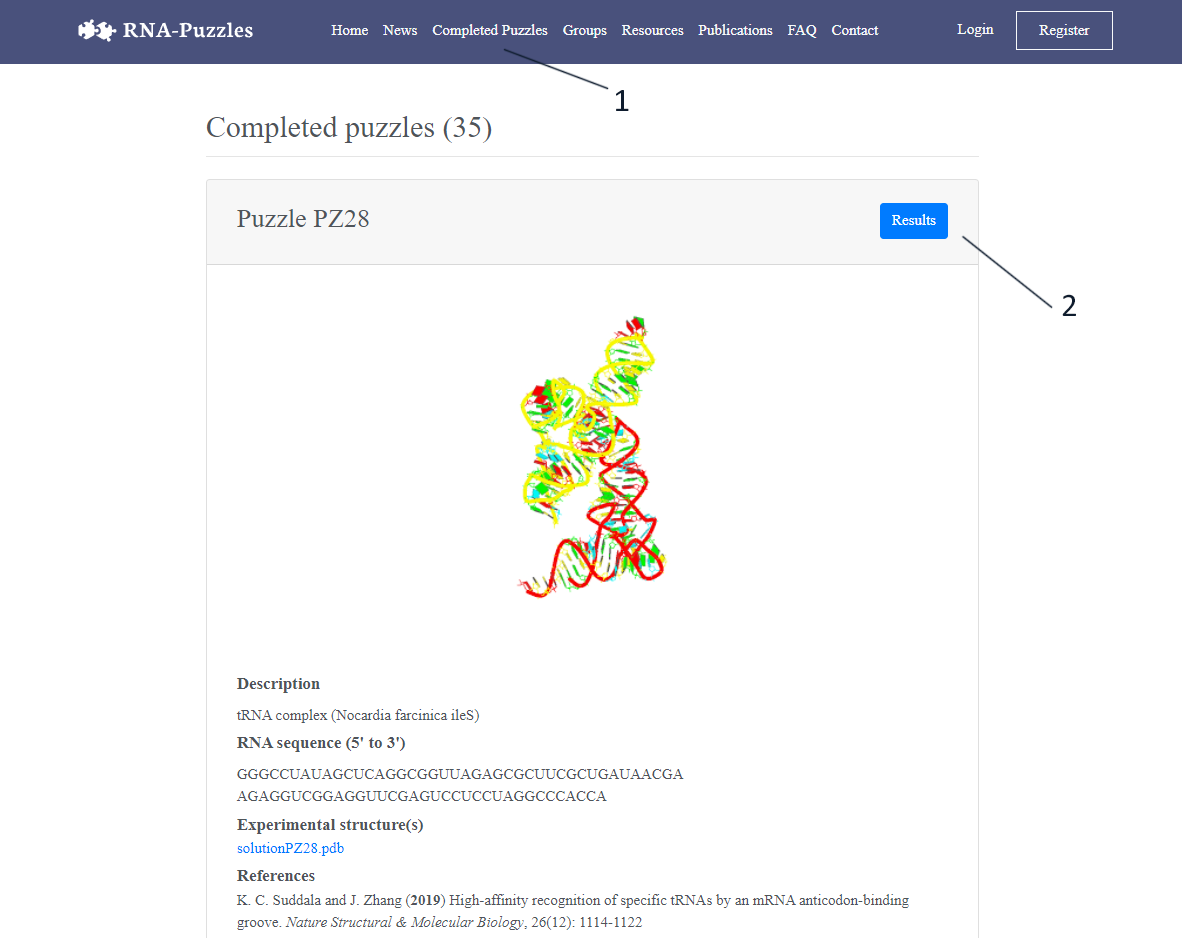
- Choose Completed Puzzles button on the navbar located on the top of your screen
- Click Results button next to the challenge you wish to see the results of
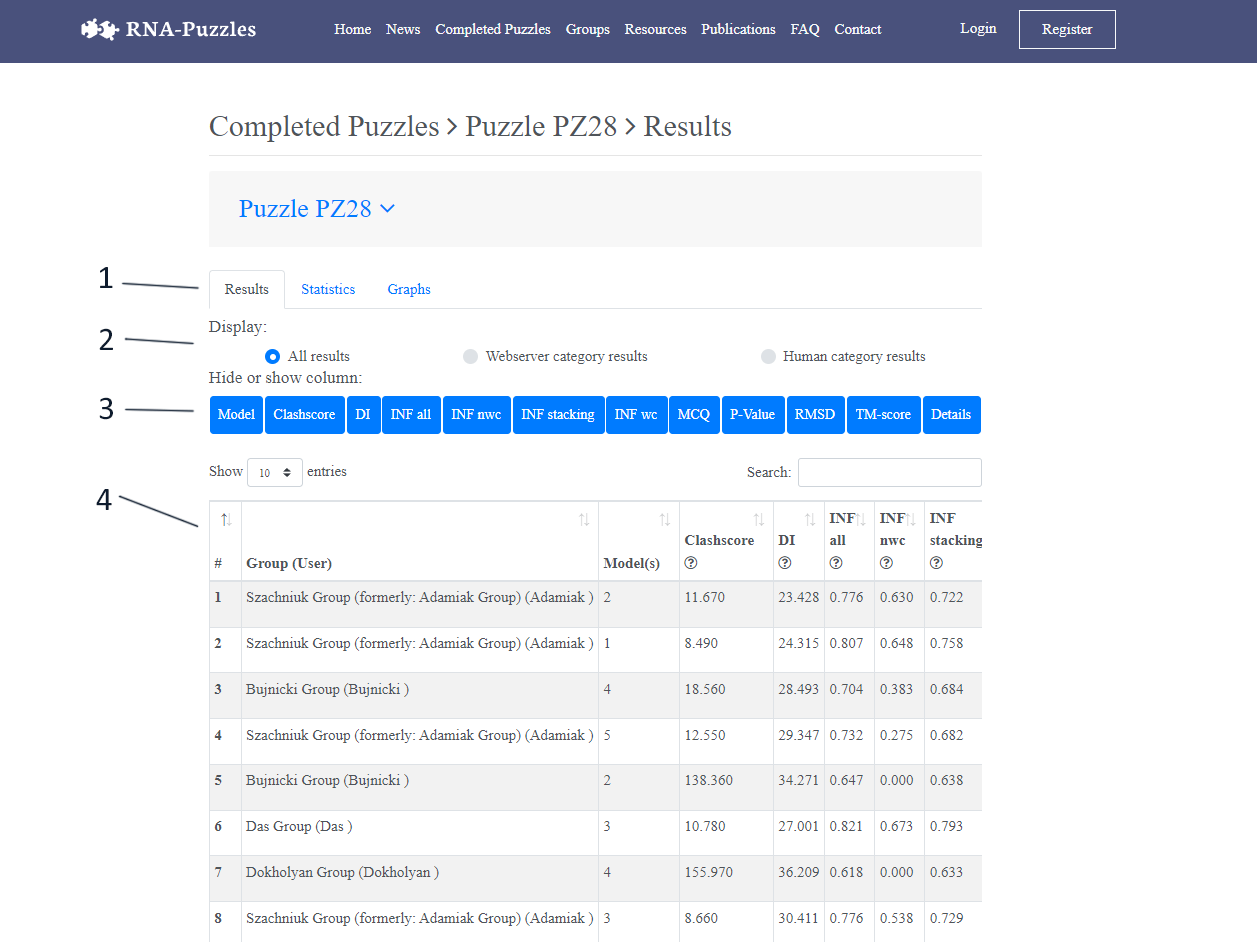
- Choose whether you want to see:
- Results of groups
- Statistics
- Graphs
- Choose to see result of webserver or human category or both
- Choose metrics to be displayed in result window
- Groups and their results
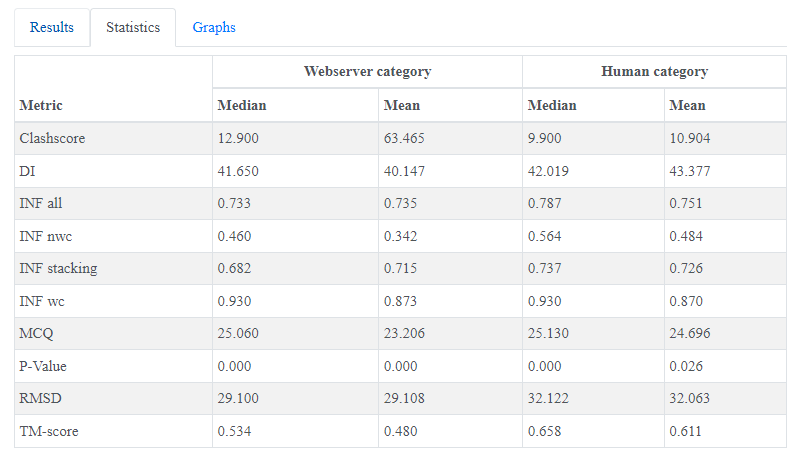
Look of statistics window
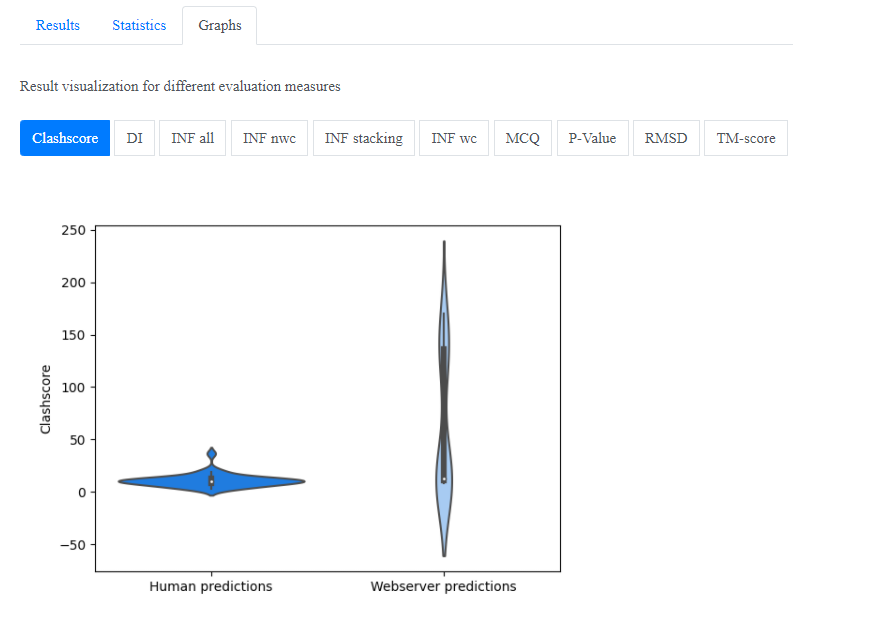
Look of graphs window - you can chose metrics that interest you
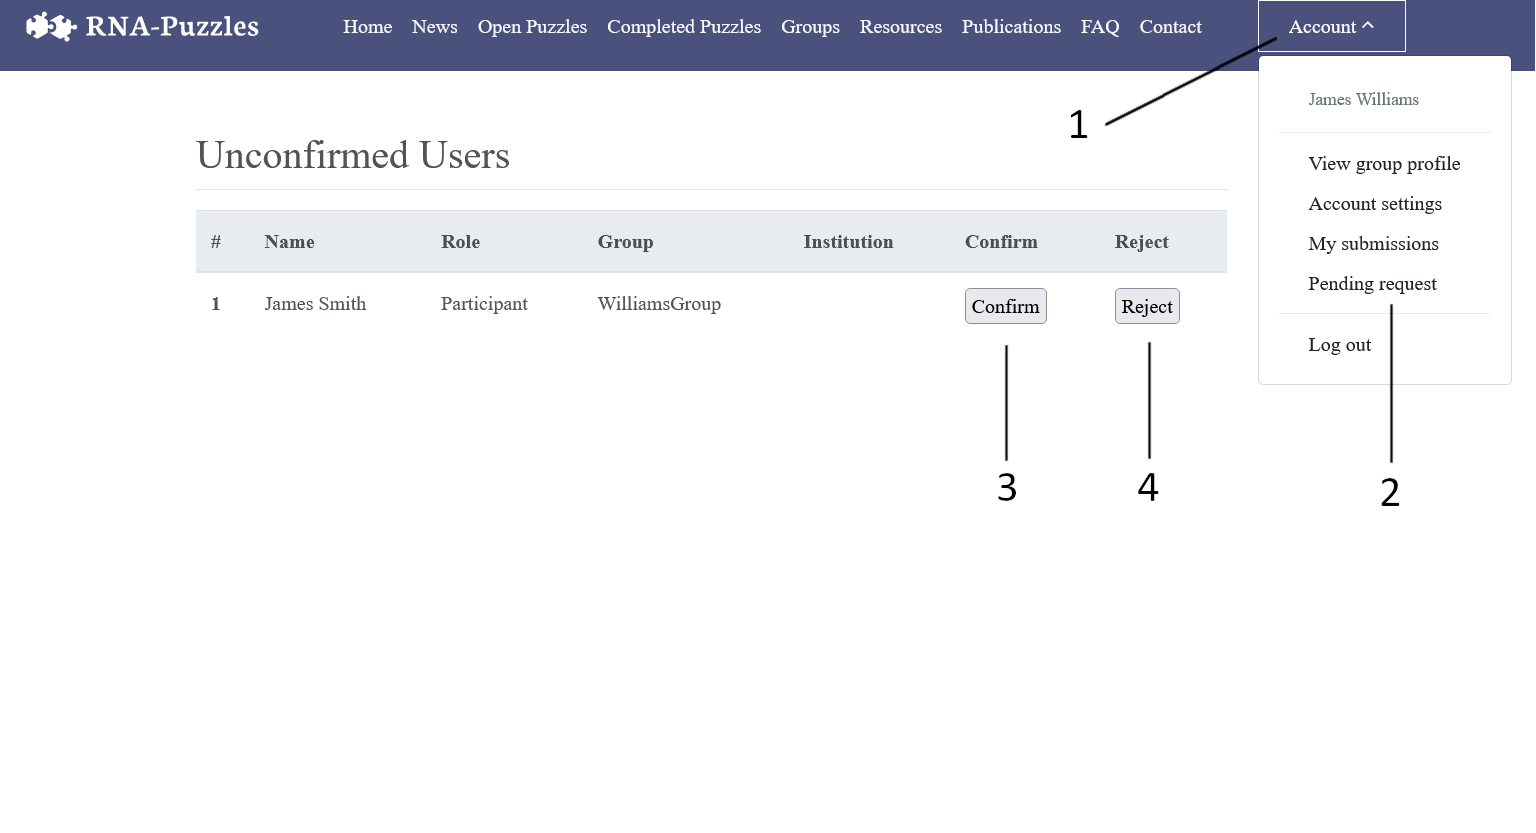
- To accept registered users into the group, click on the Account at the top right of the page
- Then select Pending Request from the drop-down menu
- The Accept button confirms the selected user's participation in the leader group
- The Reject button cancels a user's registration to a leader group
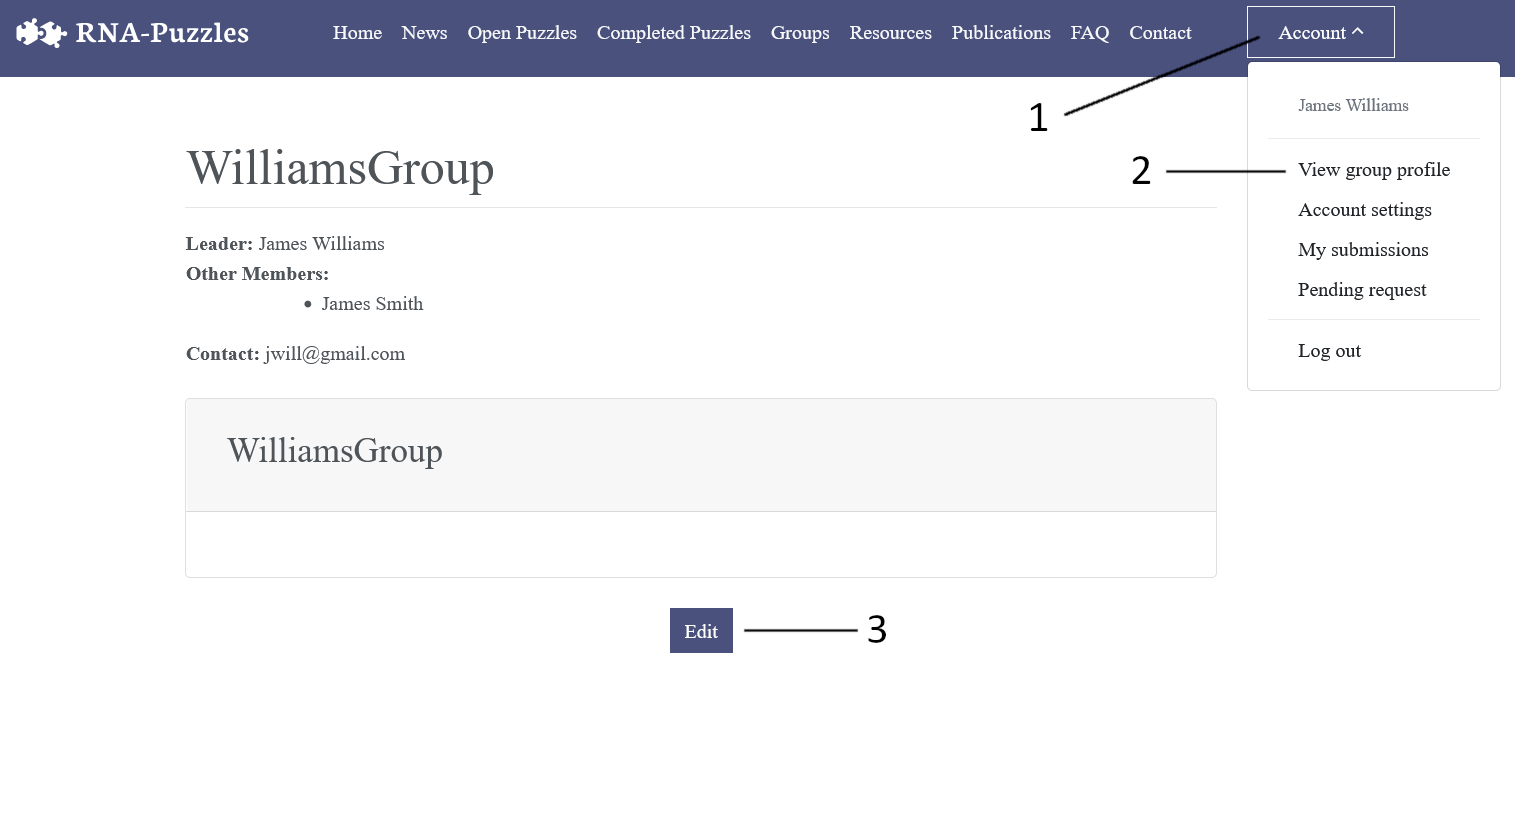
- To edit information about group, click on the Account at the top right of the page
- Then select View group profile from the drop-down menu
- Then click the Edit button at the bottom of the page, this action takes you to the group settings view
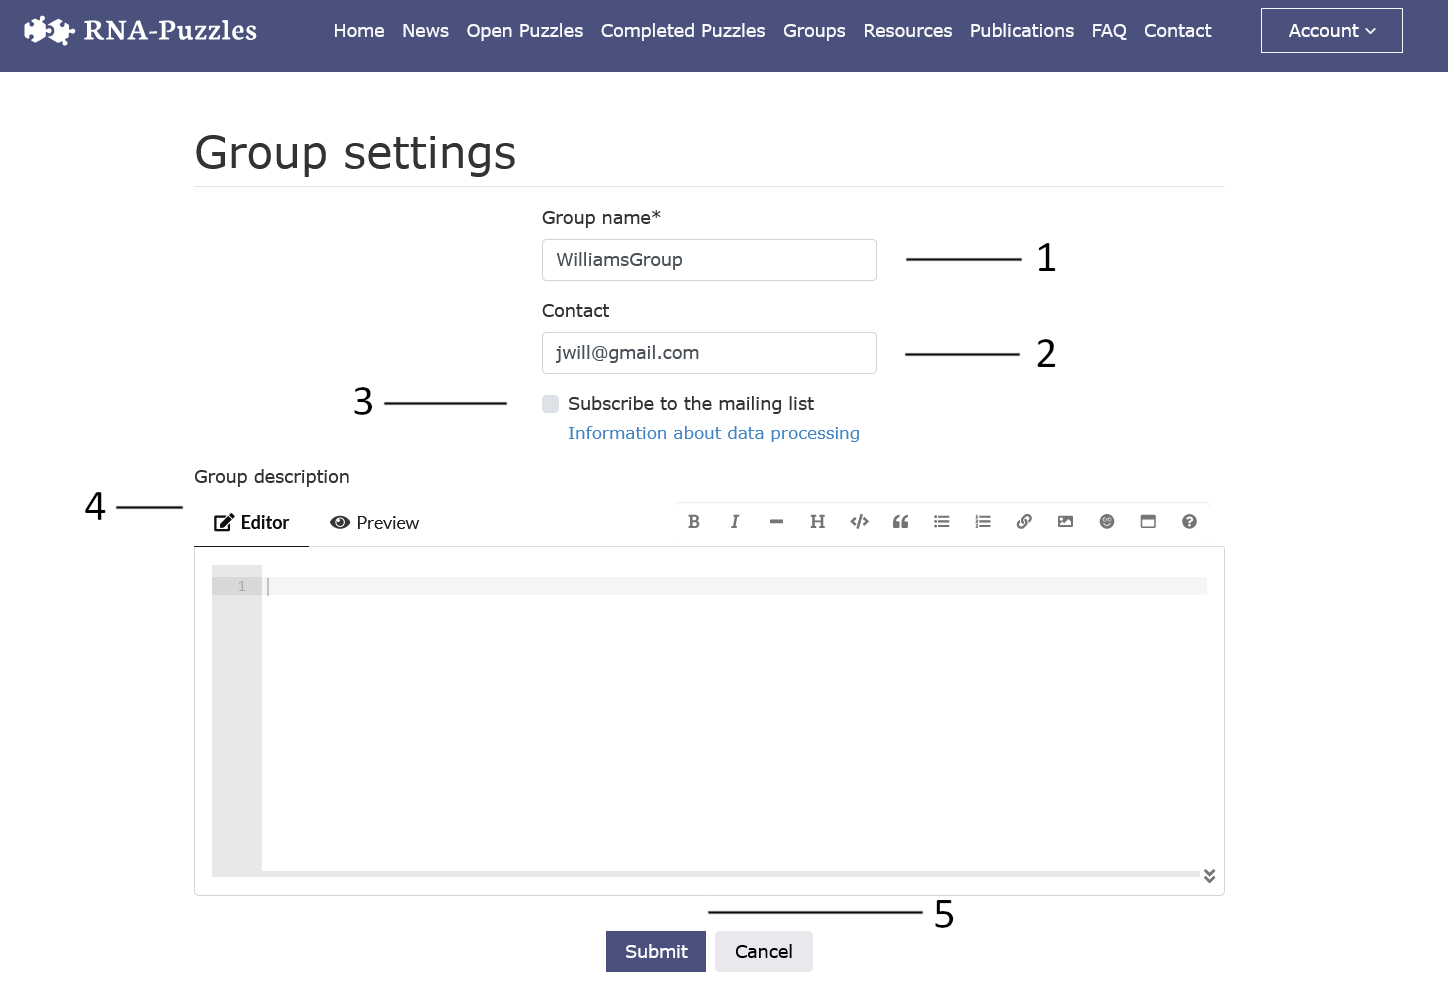
- Change of group name
- Change of contact email
- Check if the group leader wants to be informed by email about group activities
- Change of group description
- The changed data can be confirmed with Submit button or canceled with Cancel button
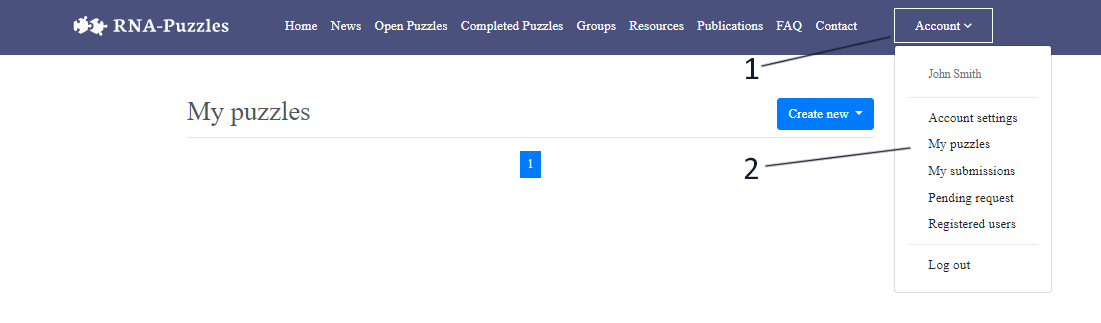
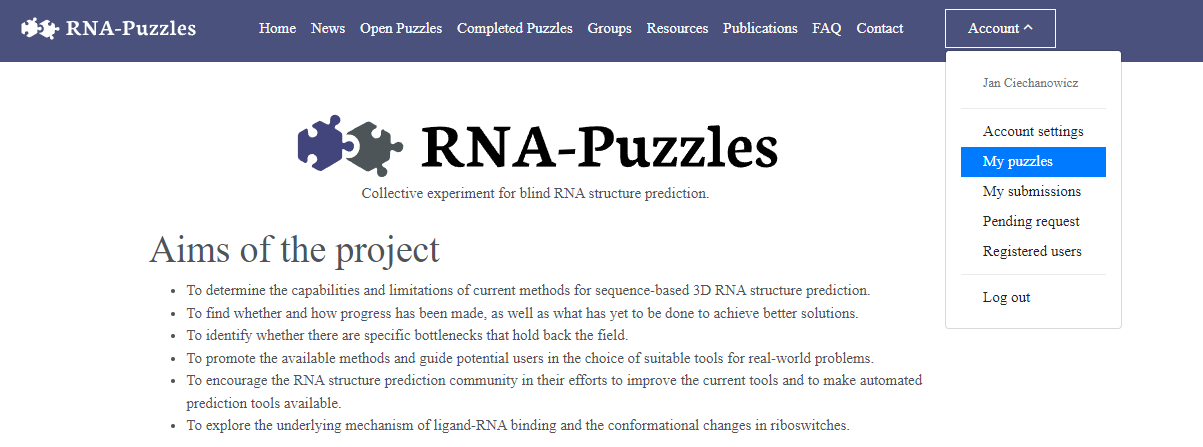
- To begin registration click Account dropdown on the navbar located on the top of your screen
- Now Click My puzzles option - it displays your challenges and lets you create new ones
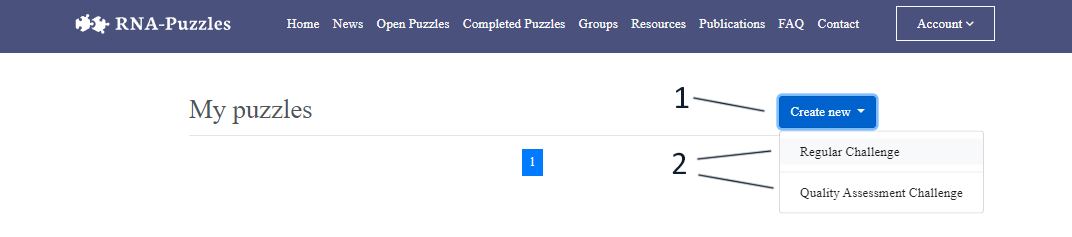
- Choose Create New Button
- Choose whether you want to create Regular or Quality Assessment Challenge
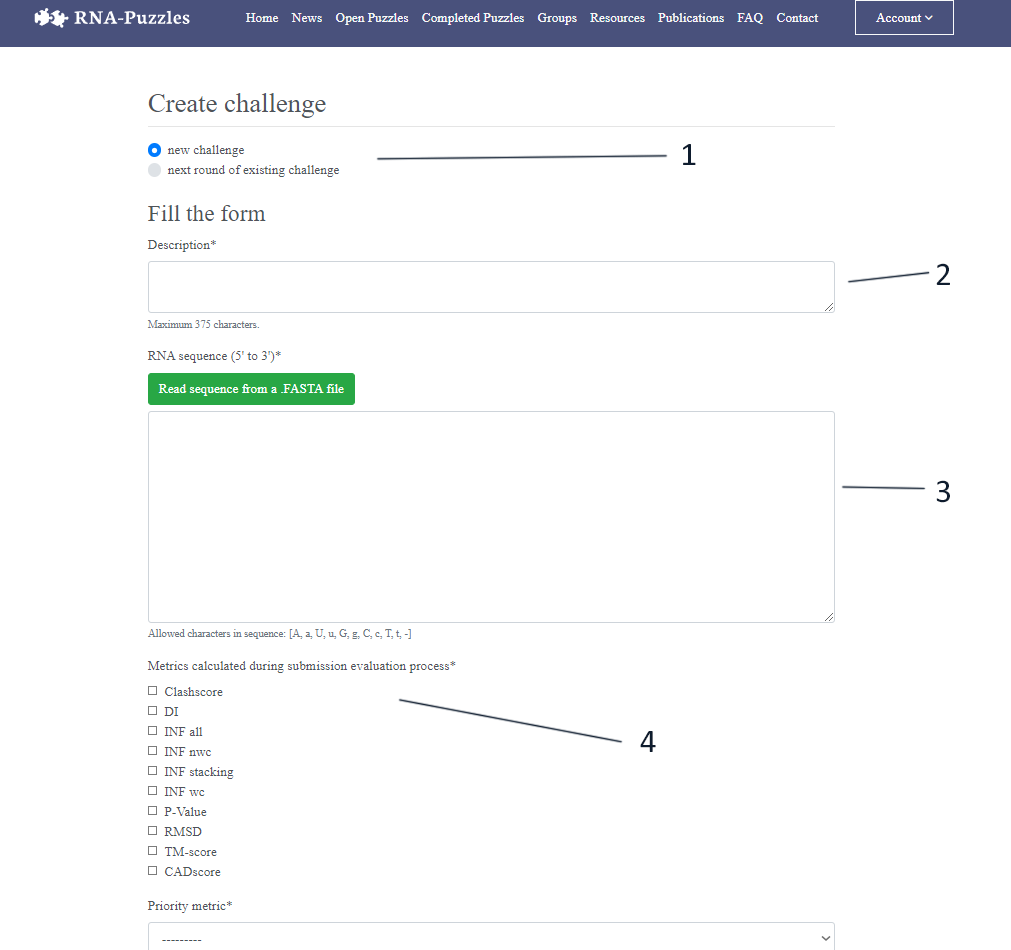
- Choose if we want to create new challenge or next round for an already existing one
- Type in description of your challenge
- Type in RNA sequence or provide it in .FASTA file
- Choose metrics that will be calculated for this challenge
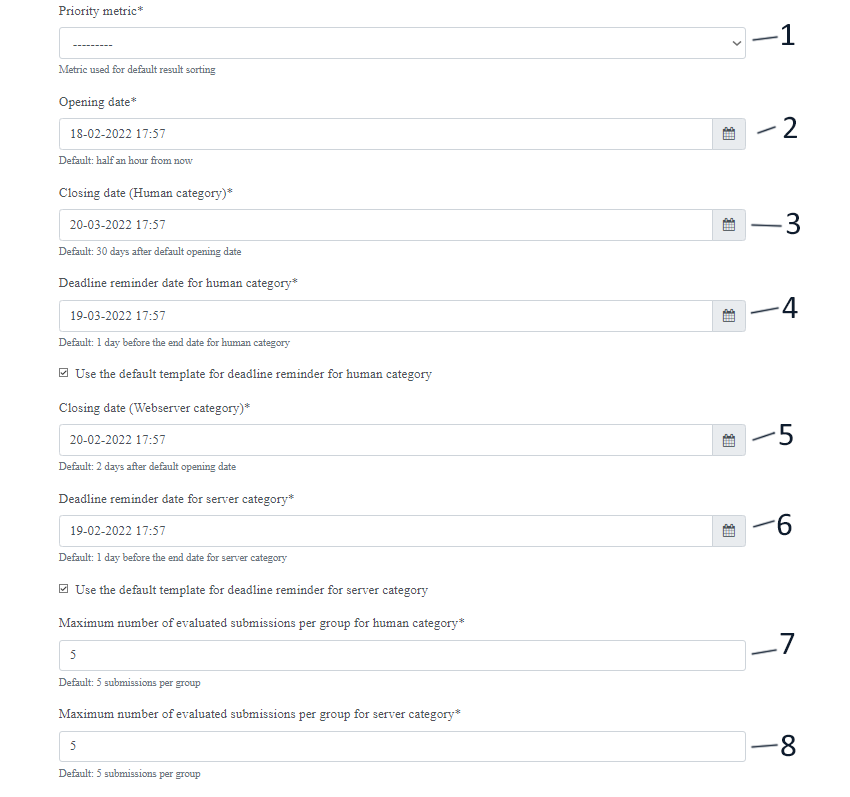
- Choose main metric that will decide result of the challenge
- Opening date of this challenge
- Closing date for Human Category
- Date when reminder about deadline will be send for Human Category
- Closing date for Webserver Category
- Date when reminder about deadline will be send for Webserver Category
- Maximum number of submissions for Human Category
- Maximum number of submissions for Webserver Category
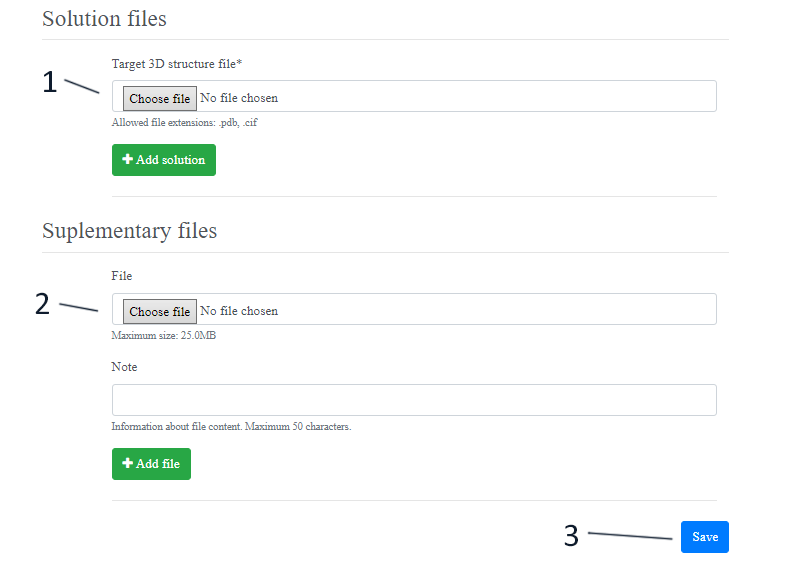
- Solution file in *.pdb or *.cif
- Additional files for participants (not required)
- Once everything is correctly filled Challenge can be saved and will begin at described date
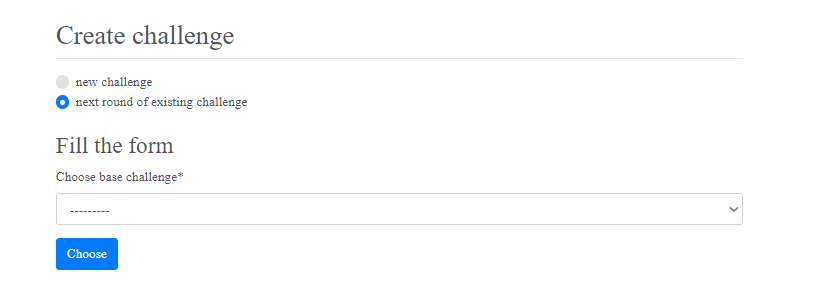
When Creating new Round for an already Existing Challenge all data except for Dates will be already filled - we only need to choose Challenge the round is based on
Firstly go into My Puzzles tab by clicking dropdown Account
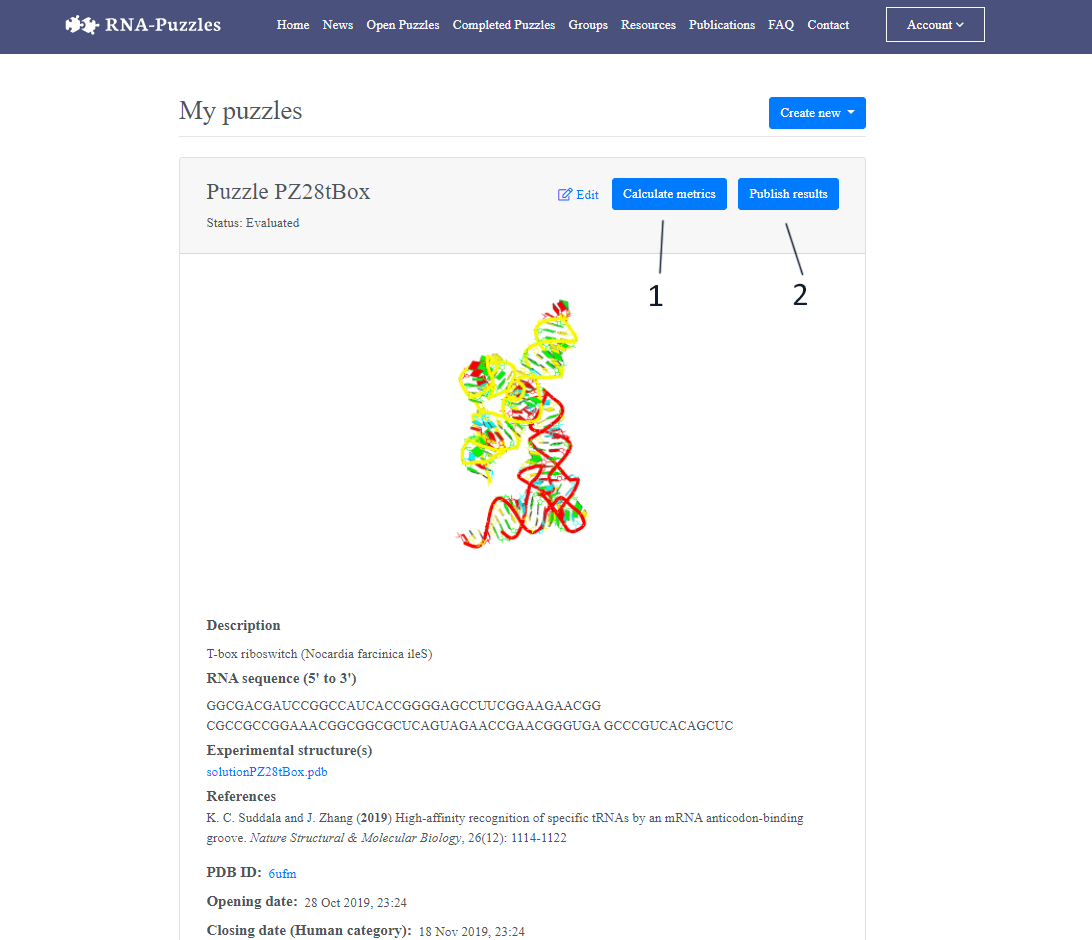
- You can choose to calculate metrics for Challenge that you organized
- Once the challenge is over you can publish results
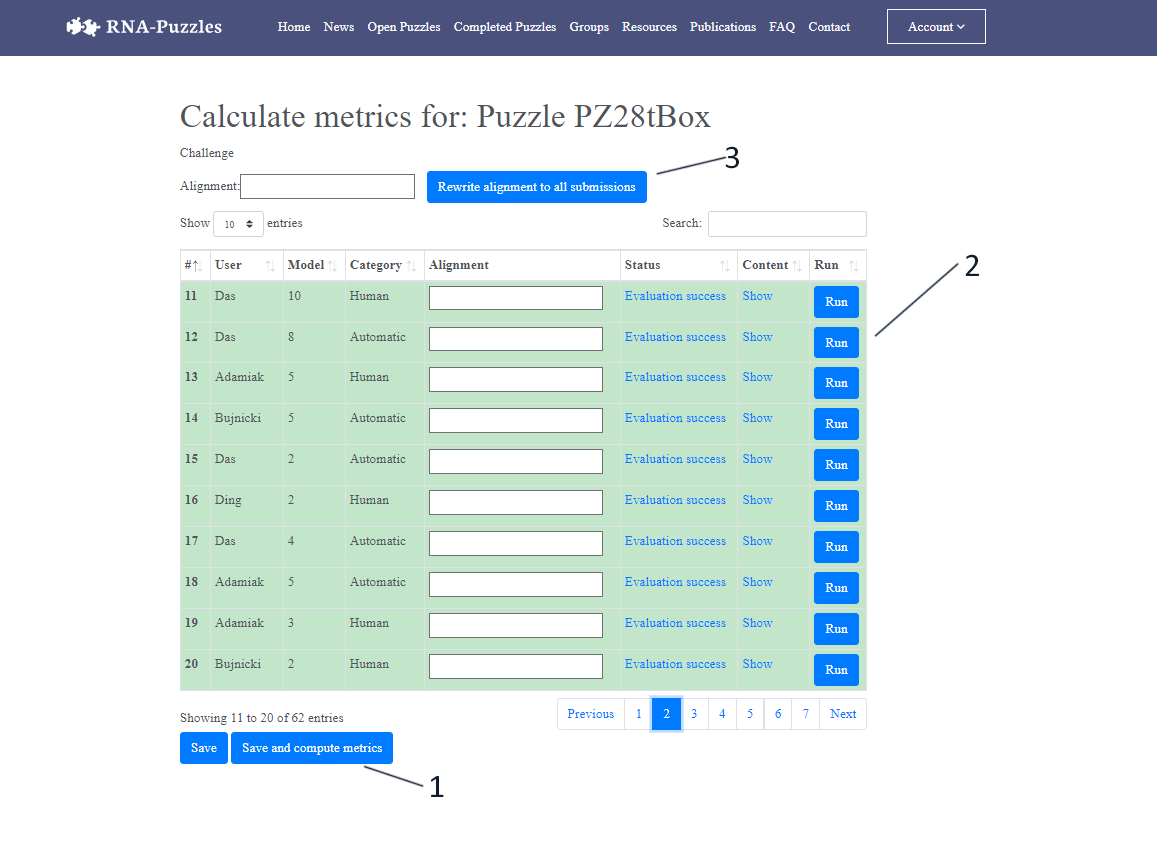
- You can calculate and save metrics for every submission
- Or you can calculate it for single ones if the needs arise
- It is possible to rewrite alignments for submissions

- To accept registered users, click on the Account at the top right of the page
- Then select Pending Request from the drop-down menu
- Choose role for registered user:
- Participant
- Group Leader
- organizer
- Select the group to which the user should belong
- The Accept button confirms the selected user
- The Reject button cancels a user's registration
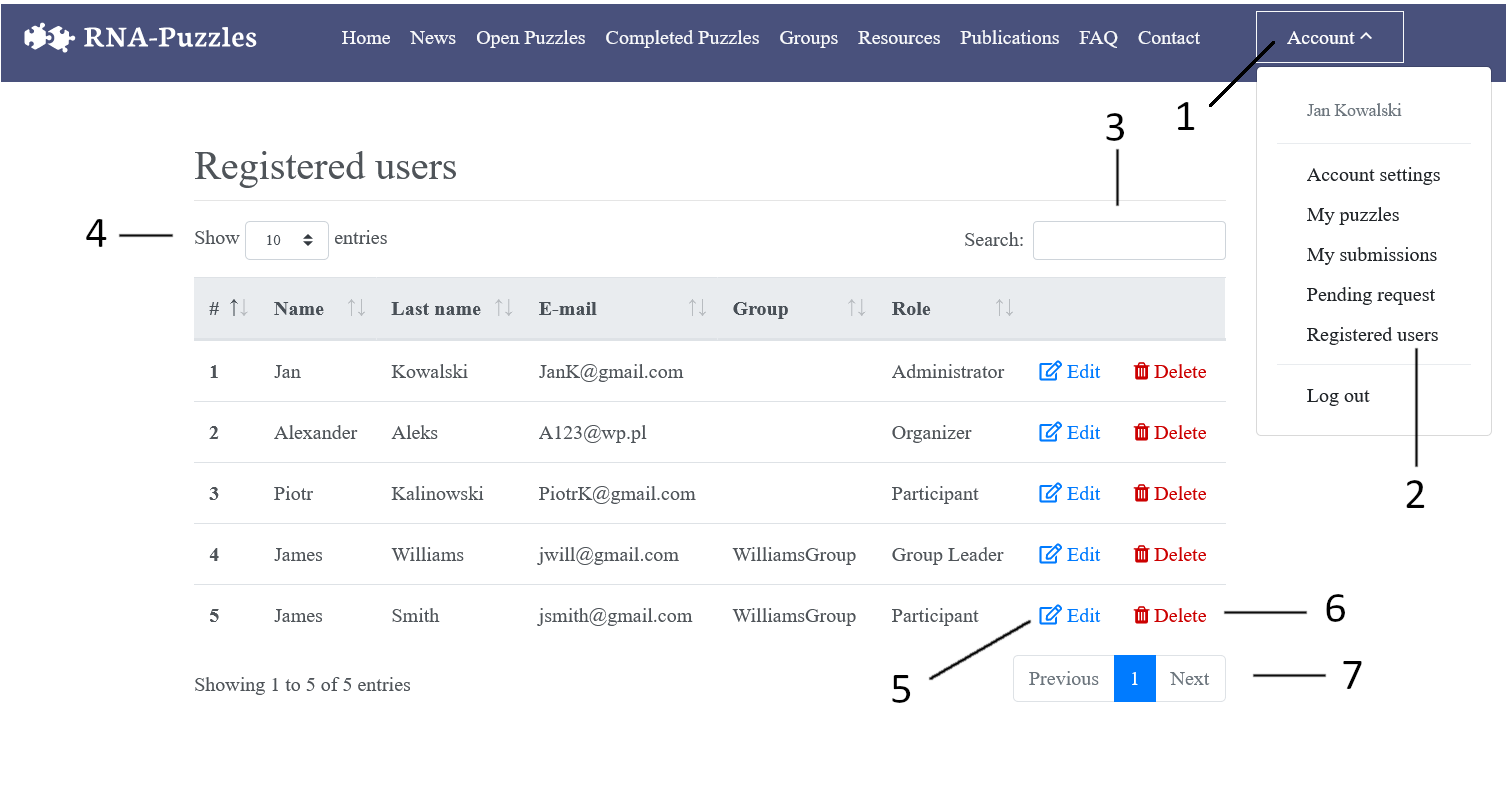
- To go to the panel with registered users, click on the Account at the top right of the page
- Then select Registered from the drop-down menu
- It is possible to search for a specific user using the Search field
- We can specify how many users should be displayed on one page
- We can edit the user information using the Edit button, this action will redirect to the view with the change form
- You can delete a user from the system using the Delete button
- It is possible to navigate to other pages with users

After using the Deletion button described in step 6, we need to confirm the deletion of the user shown in the above screen
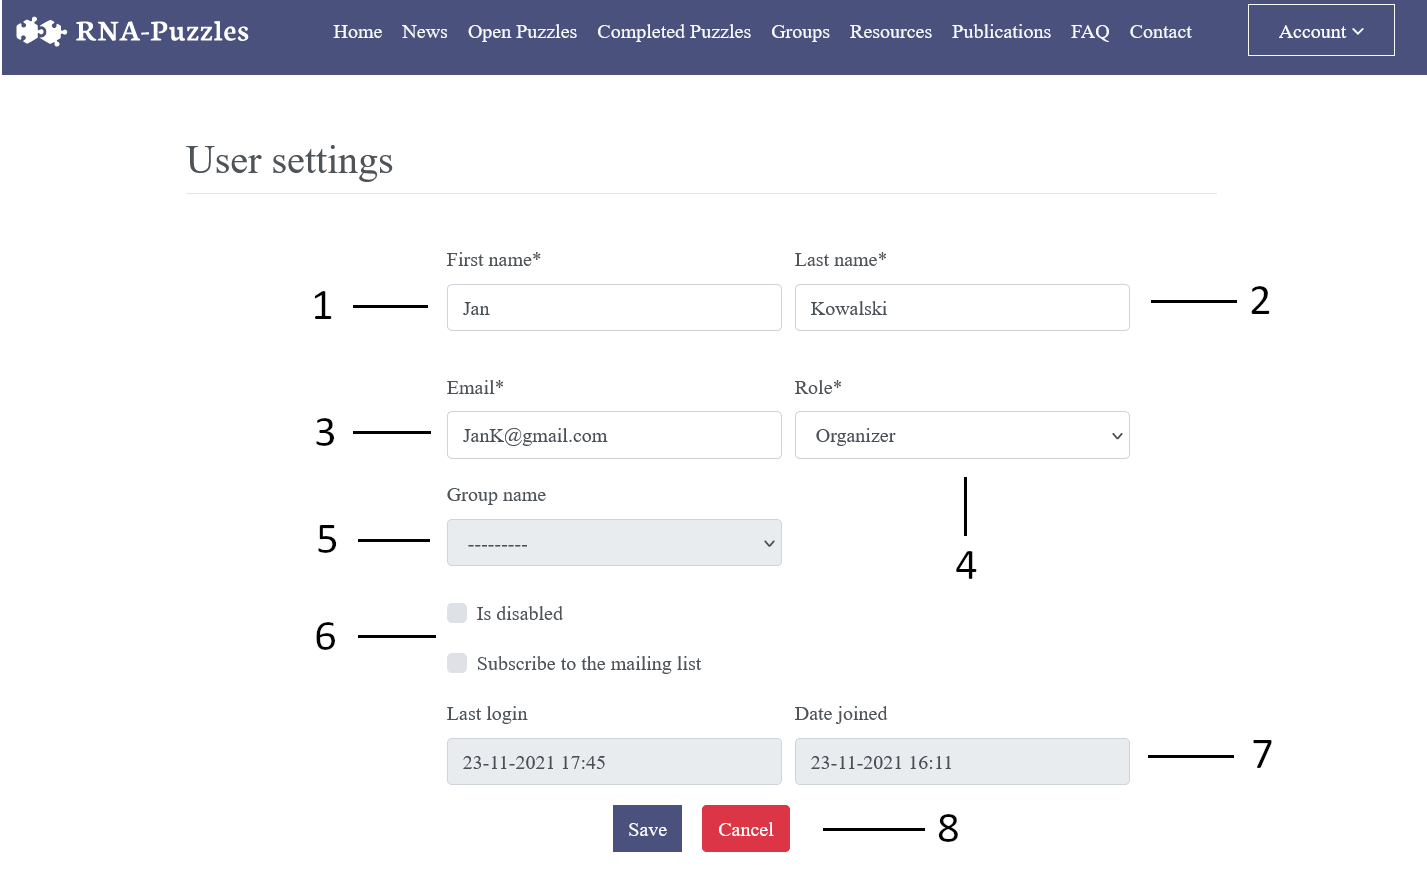
After using the Edit button described in step 6, we go to the user edit view shown above
- User's first name
- User's last name
- User's email address
- Changing the user role
- Group the user belongs to
- Possibility to block a user or enable e-mail notification
- Information about the date the user joined and the last login time
- You can confirm changes with the Save button or reject them with the Cancel button